Finally finished the Audiovox Electronic Cruise Control installation on my ST ( 91 model Standard) . Below is a brief description of what I did . Use this info at your own risk .
Location of the Servo/Brain on my ST was dictated by the fact that my left hand fairing pocket and the area on the panel aft of the pocket are occupied by Valkyrie CB Radio Brain , Radar Detector Override and several switches. Access to the Servo on my ST is difficult and may cause me to use bad language in the future if I need to get to it for some reason. Chuck Chiodinis` servo location is preferable to mine , but electronics equipment already installed precluded my use of this location. I located the servo in the forward right fairing between the instrument housing and right fairing pocket .with the cable running forward , then to the left and rearward right above the left frame rail to the carb linkage,
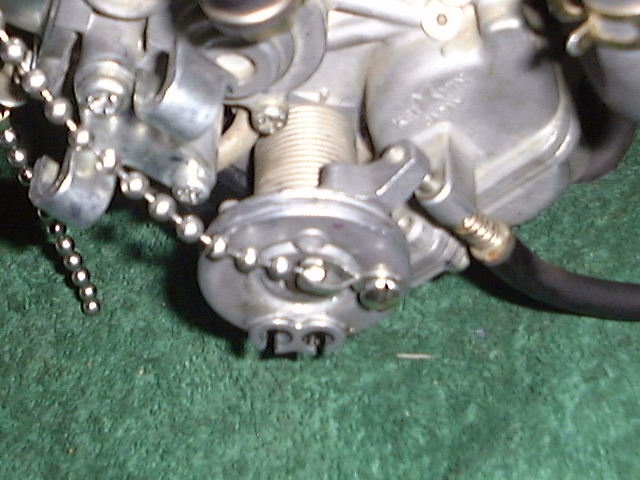
Drill and tap the throttle bellcrank to use the slotted head shoulder bolt (#34 in Avox instructions , 4 mm x .7 pitch ) with the small bead chain eyelet connector(#25) for throttle pull . LOCATION of this bolt on the bellcrank is critical for more than one reason .
Modify smaller portion of #16 to use as a bracket to anchor servo cable to air filter housing .
Use at least seven balls in your pull chain .
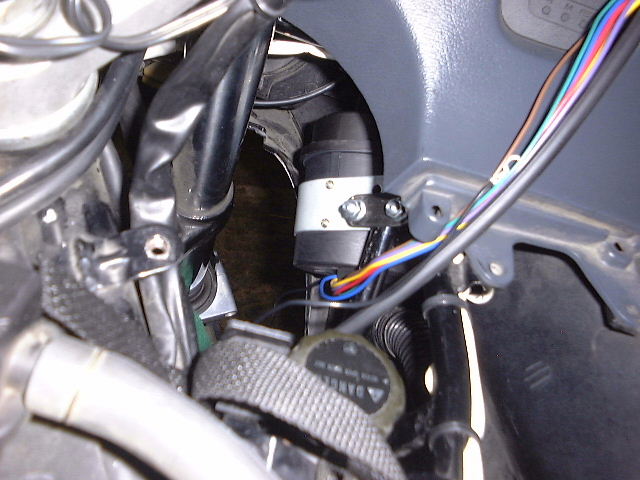
Connect blue wire (tach pickup) to the blue wire with thin yellow stripe which is one of the wires in the white , three conductor plug located between the left fairing pocket and frame rail near the front of the pocket .
Use an inline fuse (not supplied ) with the always hot ( + 12 V ) red wire .
Set dip switches 1 and 7 to on , and switches 2 through 6 to off . If I had it to do over , I would also set switch #4 to on .
Connect purple wire to the switched to +12V when brakes applied wire on the right side of the bike between the rear brakelight switch and wiring harness .Applying either brake causes 12V to appear on this wire .
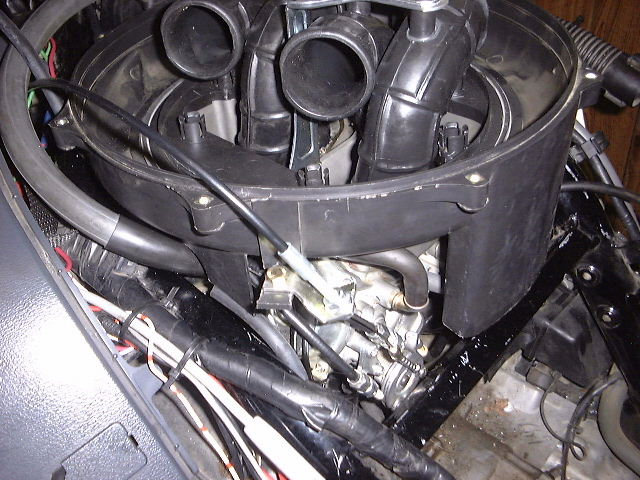
To remove carbs , the upper clamps on each carb boot should be loosened before removal attempt . It is VERY DIFFICULT to see these and a long #2 phillips screwdriver is required . NOTE the orientation of the carb side of one of these boots and note the V notches on the intake manifold side of the boot used to orient the boot on the intake manifold . These V tabs on the manifold side of the boot are fragile .
SPECIAL clamps on the carb side of the boots " pin " the clamp so that you can tighten the clamp without having to hold the clamp in place (Blind Clamps ??? ) .
Each intake port has a vacuum port between the carb boot and head .
Mine WAS a California Model and presented a lot of problems . Look for a sticker on the rear fender under the seat (black with white lettering ) . Mine has one that says " California Vehicle " .
Caution : Trying to use the crossover link between the carbs for a throttle pull is futile .
A defective Servo/Brain from the Audiovox carton really gave me fits .
Usual disclaimers apply . Don`t blame me if you f**k up !
If you have a problem and call the Audiovox " hotline " , you will prolly be stonewalled . " They have no motorcyle applications " .
Tail Light Modulators may cause problems with the cruise control operation and might have to be removed from the ST . YMMV .
Bill Boyd Summit,MS #2542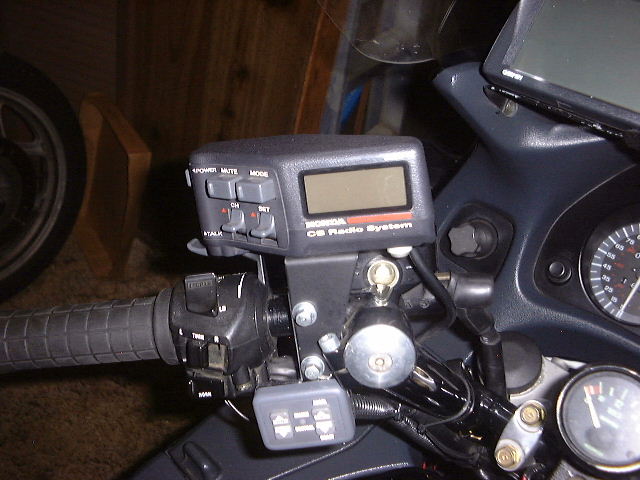
[
Now
-- Main
-- Humor
-- Art
-- Food
]
[
seti@home
-- Shooting
-- Motorcycle
-- Blog
]
Disclaimer: Anything I have to say is mine, dammnit! My employers, clients nor anyone else can take credit (or be blamed) for it.
Author: Will England (will@mylanders.com) Complaints? /dev/null
This page is a Y to K complaint.
Mostly compliant with ![]()

Created November 30, 2005 :: Updated Thursday, September 06 2018 @ 01:52am